Installation / Setup
Prerequisites
Before you begin, ensure you meet the following requirements:
-
Operating System: Ubuntu 22.04 LTS
-
Sudo Permissions: You must have administrative privileges.
-
Required Packages: Install the following packages using
apt:sudo apt update && sudo apt install git wget curl make build-essential python3 python3-pip
NOTE: Some commands may require user verification. Please accept or continue when prompted during execution.
Step 1: Install PX4 and ROS 2
- Set Up PX4 Environment:
- Go to the Install PX4 section.
- Scroll to "Set up a PX4 development environment on Ubuntu."
- Copy and paste the provided command block.
- Download and Install ROS 2:
- Go to the Install ROS 2 section.
- Follow steps one and two to install ROS 2 Humble. Note: This process may take several minutes.
Stop at the "Setup Micro XRCE-DDS Agent & Client" section.
Step 2: Install MAVROS
To install MAVROS, follow the official instructions.
In my case, I used the following commands:
cd ~
sudo apt install ros-humble-mavros ros-humble-mavros-extras
wget https://raw.githubusercontent.com/mavlink/mavros/ros2/mavros/scripts/install_geographiclib_datasets.sh
sudo sh install_geographiclib_datasets.sh
Step 3: Clone UROC ROS Node
To clone the UROC ROS node, copy and paste the following command block below into your terminal.
mkdir -p ~/ros2_ws/src
cd ~/ros2_ws/src
git clone https://github.com/UMD-UROC/ROS2-Data-Visualizer-Package
mv ROS2-Data-Visualizer-Package umd_uroc_data_visualizer
cd umd_uroc_data_visualizer
git config core.hooksPath .githooks
cd ..
cd ..
sudo rosdep init
rosdep update
rosdep install -i --from-path src --rosdistro humble -y
Step 4: Download QGroundControl
Go to the Ubuntu Linux section and follow the steps up to the Android section.
Here are the commands I used:
sudo usermod -a -G dialout $USER
sudo apt-get remove modemmanager -y
sudo apt install gstreamer1.0-plugins-bad gstreamer1.0-libav gstreamer1.0-gl -y
sudo apt install libfuse2 -y
sudo apt install libxcb-xinerama0 libxkbcommon-x11-0 libxcb-cursor-dev -y
cd ~
curl -O https://d176tv9ibo4jno.cloudfront.net/builds/master/QGroundControl-x86_64.AppImage
chmod +x QGroundControl*.AppImage
Reboot your system to apply the user permission changes.
It is advised to download the AppImage into your home directory to match the steps these directions follow
Step 5: Enable Port Forwarding in QGroundControl
To enable port forwarding in QGroundControl:
-
Launch QGroundControl:
cd ~./QGroundControl-x86_64.AppImage -
Follow the steps in the screenshots below to enable port forwarding:
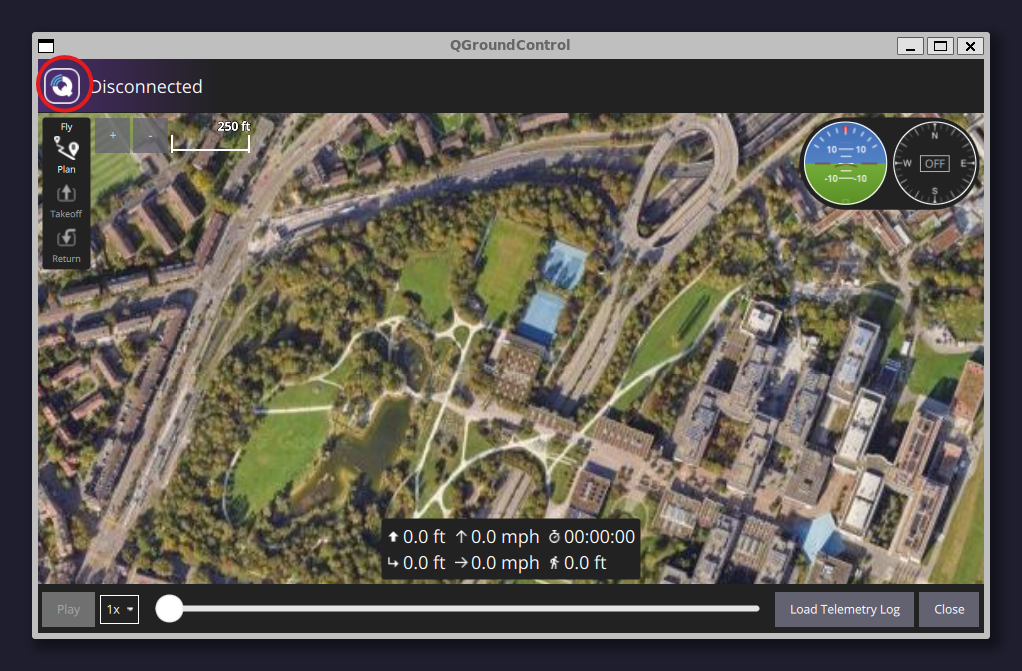
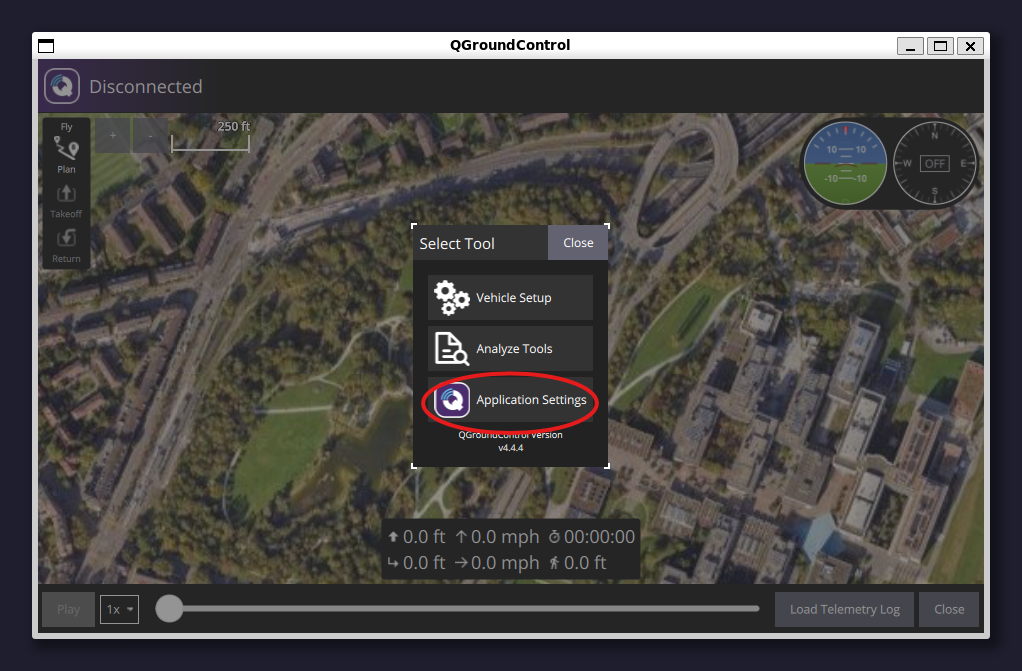
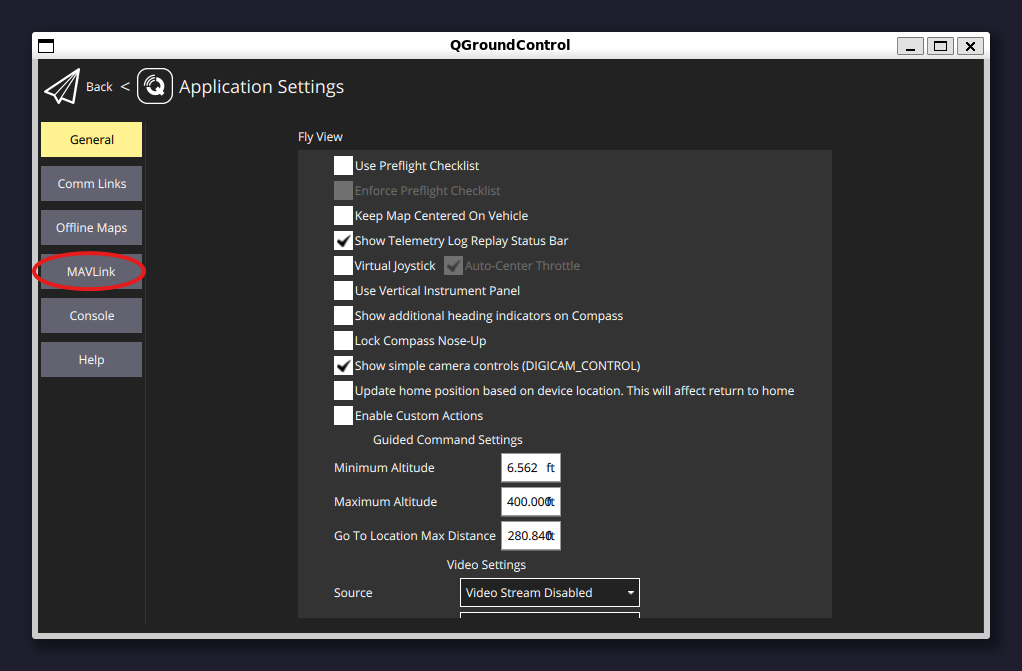
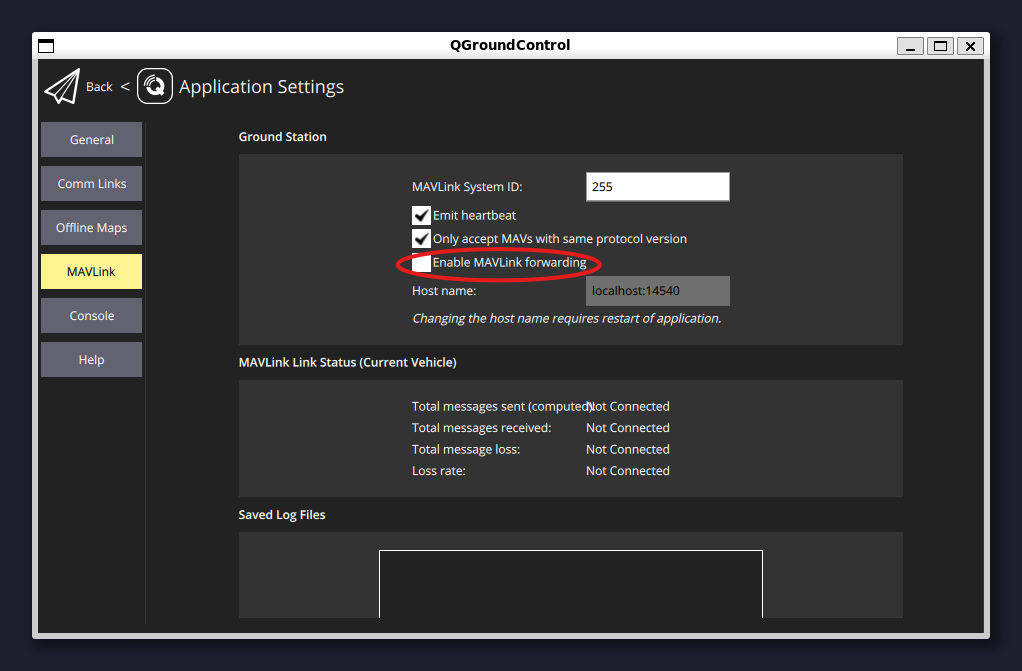
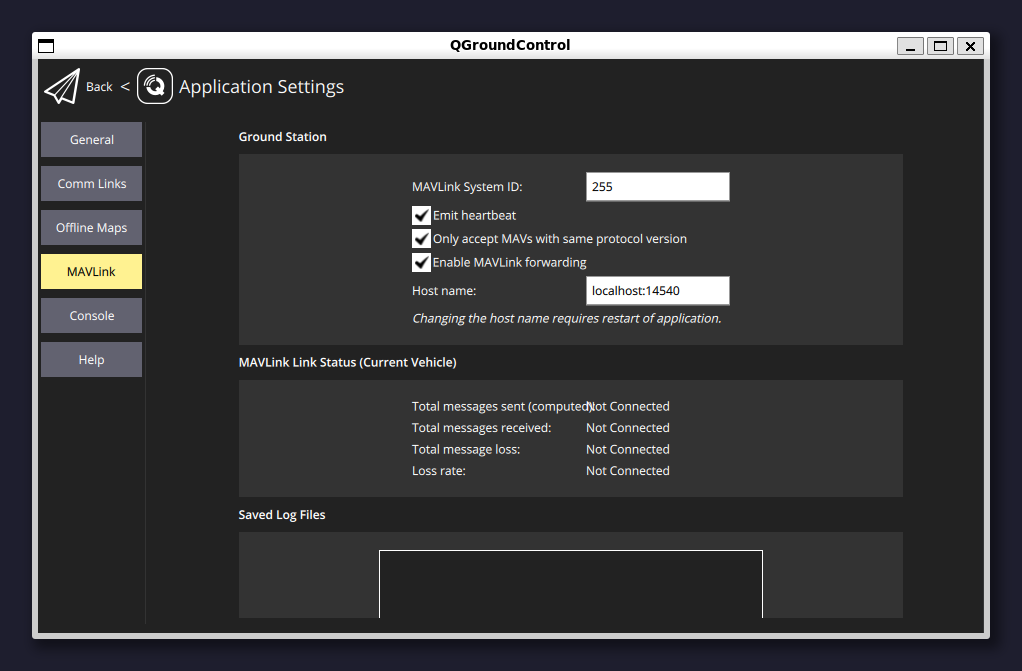
Due to a recent QGroundControl UI update, the MAVLINK forwarding configuration is now located in the telemetry tab.
You may now close QGroundControl.
Step 6 (Option 1): Install PlotJuggler
Install PlotJuggler by following the official instructions for Ubuntu 22.04 with ROS2 support.
I used the following command:
sudo snap install plotjuggler
Step 6 (Option 2): Set Up Foxglove
Part 1: Install Foxglove Desktop
To install Foxglove, use the instructions below:
Download the latest tools from Foxglove.
I used these commands:
cd ~/Downloads
sudo apt install ./foxglove-studio-*.deb
sudo apt update && sudo apt install foxglove-studio
Part 2: Install Foxglove Bridge
Follow the instructions here to install Foxglove Bridge.
I ran this command:
sudo apt install ros-humble-foxglove-bridge
Step 7: Test the Setup
Open four terminal windows and run the following commands in each:
Terminal 1: Start PX4 with Gazebo
cd PX4-Autopilot/
make px4_sitl gz_x500_gimbal
Terminal 2: Launch QGroundControl
cd ~
./QGroundControl-x86_64.AppImage
Terminal 3: Start MAVROS
ros2 run mavros mavros_node --ros-args -p fcu_url:=udp://:14540@127.0.0.1:14557 -p target_component_id:=1 -r __ns:=/mavros
Launch Foxglove or PlotJuggler
Depending on your needs, you may use either Foxglove or PlotJuggler.
To run Foxglove, use the following command in a fourth terminal:
cd ~/ros2_ws && colcon build --packages-select umd_uroc_data_visualizer && source install/local_setup.bash && ros2 launch umd_uroc_data_visualizer visualize.py
And in a fifth terminal:
ros2 launch foxglove_bridge foxglove_bridge_launch.xml
And lastly in a sixth terminal run this command
foxglove-studio "foxglove://open?ds=foxglove-websocket&ds.url=ws://localhost:8765/"
To run PlotJuggler, use this command in a fourth terminal:
plotjuggler
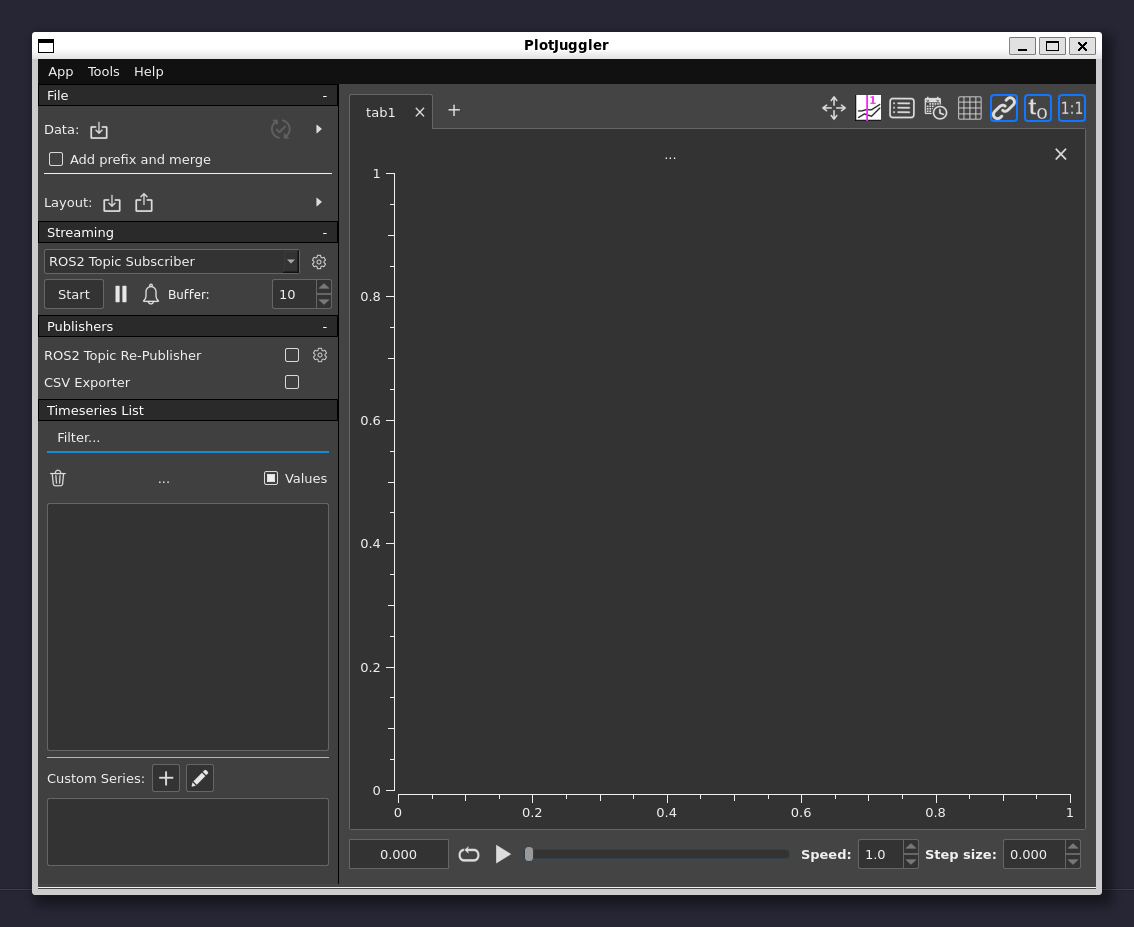
Step 8: (PlotJuggler Only):
To visualize live data in PlotJuggler:
- Click the Start button under the "Streaming" section on the left side of the screen.
- Ensure "ROS Topic Subscriber" is selected.
- Click the start button and select the desired topics to subscribe to.
Step 9 (Optional): Use Helper Script
If you haven't noticed by now, you have to open a lot of terminals up. This can result in a mess appearing on your screen. To fix this a "helper script" was written. This script automates all of this into a single command.
Below is an example of how you would use this script:
# To start Foxglove data visualization tooling
python3 mavinsight.py --foxglove

# To start PlotJuggler data visualization tooling
python3 mavinsight.py --plotjuggler
Installation:
There isn't really an "installation" for this script. You are just downloading it to a location of your choice. In the steps below, we will be downloading it to our home directory ($HOME).
cd ~
curl -O https://raw.githubusercontent.com/UMD-UROC/MAVInsight/refs/heads/main/mavinsight.py
Then we can run the script as long as we are in our home directory and call it like demonstrated above.